

How to install a spigot on a multi - purpose barrel?
Hey there! As a supplier of multi - purpose barrels, I often get asked about how to install a spigot on these barrels. It might seem like a daunting task at first, but with the right tools and a bit of know - how, you can have it done in no time. In this blog, I'll walk you through the whole process step by step.
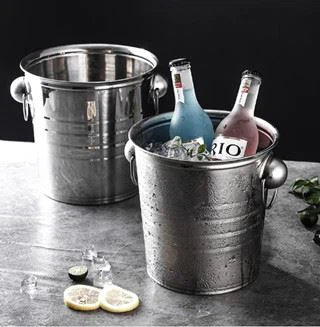
First off, let me tell you a bit about the multi - purpose barrels we offer. We have a wide range of options, like the Stainless Steel Soup Bucket Soup Barrel, which is great for holding soups, stews, or even as a storage container for dry goods. Then there's the Deep Thickening Barrel Soup Barrel Pot, perfect for those who need a deeper container for larger batches of food. And if you're into entertaining, our Double Ring Champagne Bucket is a real show - stopper.
Now, let's get into the spigot installation. The first thing you'll need are the right tools. You'll need a drill, a hole saw that matches the size of your spigot, a screwdriver, Teflon tape, and of course, the spigot itself. Make sure you choose a spigot that's compatible with the material of your barrel. For example, if you have a plastic barrel, a plastic or brass spigot would work well. For a metal barrel, a stainless - steel spigot is a good choice.
The first step is to choose the right location for your spigot. You want to place it at a height that's convenient for pouring but also low enough so that you can empty most of the contents of the barrel. A good rule of thumb is to place it about 2 - 3 inches from the bottom of the barrel. Mark the spot with a marker or a piece of tape.
Once you've marked the spot, it's time to drill the hole. Put on your safety glasses and use the hole saw to drill a hole in the barrel. Make sure you drill slowly and steadily to avoid cracking or splitting the barrel. If you're using a plastic barrel, you might want to use a piece of scrap wood behind the area you're drilling to prevent the plastic from cracking on the other side.
After you've drilled the hole, clean up any burrs or rough edges around the hole. You can use a file or sandpaper to smooth it out. This will ensure a good seal when you install the spigot.
Now, it's time to prepare the spigot. Wrap a few layers of Teflon tape around the threads of the spigot. This will help create a watertight seal and prevent leaks.
Next, insert the spigot into the hole from the inside of the barrel. Make sure it fits snugly. If it's a bit loose, you might need to use a washer or some sealant to make it fit better.
Once the spigot is in place, use the screwdriver to tighten the nut on the outside of the barrel. Don't over - tighten it, as this could damage the barrel or the spigot. Just make sure it's tight enough to prevent leaks.
After you've tightened the nut, give the spigot a little test. Fill the barrel with some water and open the spigot to see if it's working properly. Check for any leaks around the spigot. If you see any leaks, try tightening the nut a bit more or adding some more Teflon tape.
If everything is working fine, you're all set! Your multi - purpose barrel now has a spigot, making it even more useful. You can use it to dispense liquids easily, whether it's soup, water, or even champagne.
In conclusion, installing a spigot on a multi - purpose barrel is a relatively simple process that can greatly enhance the functionality of your barrel. With the right tools and a bit of patience, you can do it yourself.
If you're interested in purchasing any of our multi - purpose barrels or have any questions about spigot installation or our products in general, feel free to reach out to us for a purchase discussion. We're always happy to help you find the right barrel for your needs.
References

- General DIY knowledge and experience in barrel installation and product handling.